
Global layers are created from a layer you have already built on a product. You set the layer up as normal, confirm it behaves the way you want, and then promote it.
Promoting a layer
- Open a product's configurator,
- Build the layer and its choices as you normally would,
- Open the layer's settings,
- Press Make Global.
The layer is saved as a global layer, and the layer on this product becomes a link to it rather than a standalone copy. A short progress message — Creating global layer… — is shown while it saves.
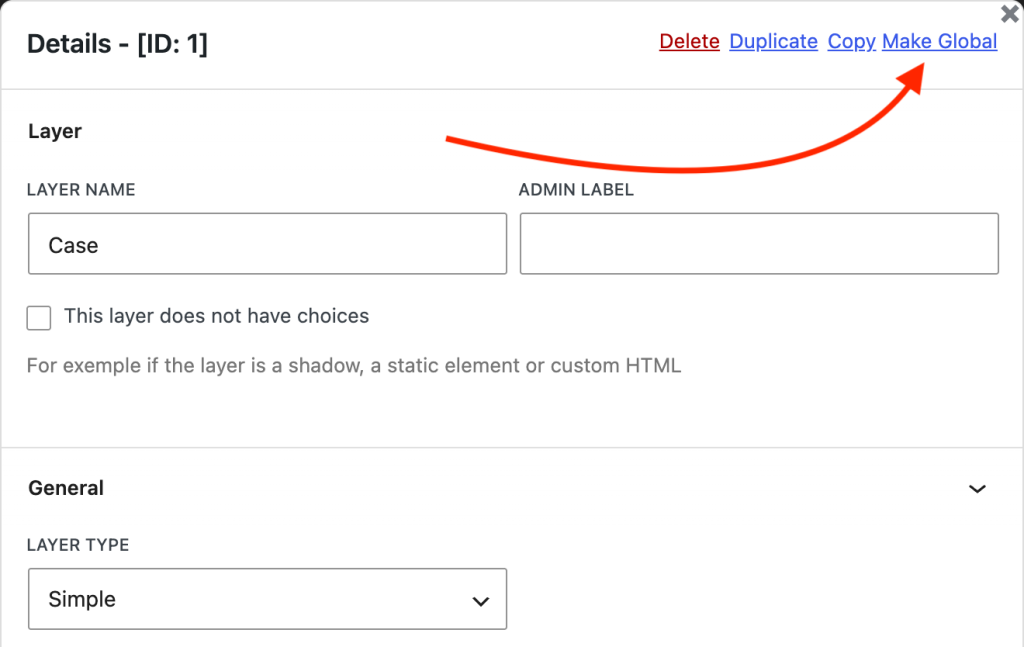
Because you build the layer in the normal editor first, there is no separate "global layer builder" to learn. Anything you can do in a layer — swatches, images, groups, descriptions — carries over.
What a linked layer looks like
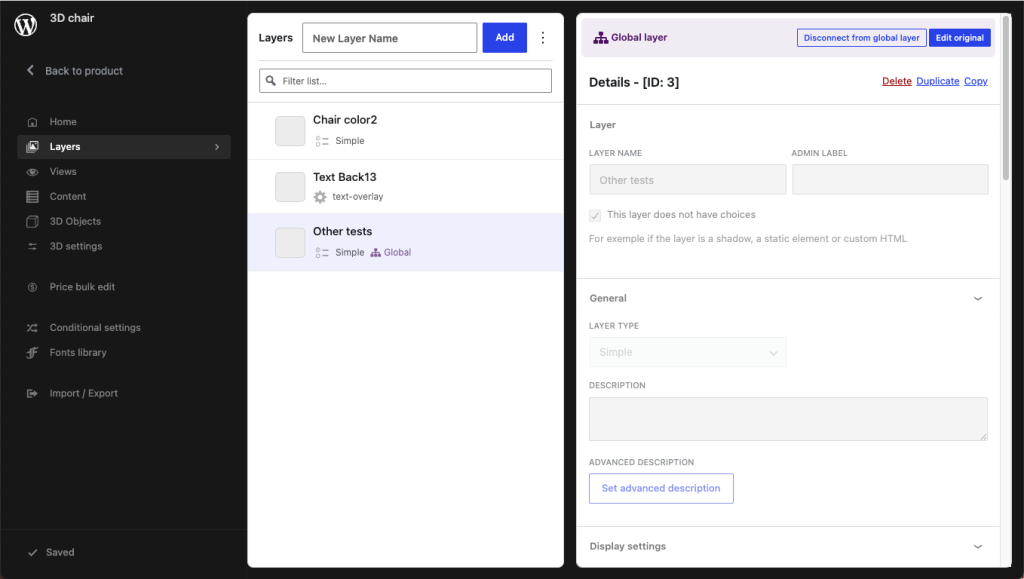
Once a layer is global, it is marked as such everywhere it appears. In the layers list it carries a Global badge next to its type, and its details panel gains a Global layer bar with two actions:
- Edit original — unlocks the layer so you can change it. You are editing the shared layer, so the change reaches every product using it.
- Disconnect from global layer — turns it back into an ordinary local layer on this product. It keeps the content it currently has, the global layer itself is unaffected, and other products carry on using it. Save the product afterwards to make it stick.
Until you press Edit original, the layer's name, type, description and choices are shown greyed out. That read-only default is deliberate: it stops you changing something shared while your attention is on a single product.
Where global layers live
Global layers are listed under Product Configurator > Global Layers.
The list shows, for each one:
- Layer Type — the type of the layer it was made from,
- Layer Name — the layer's name,
- Choices — how many choices it contains.
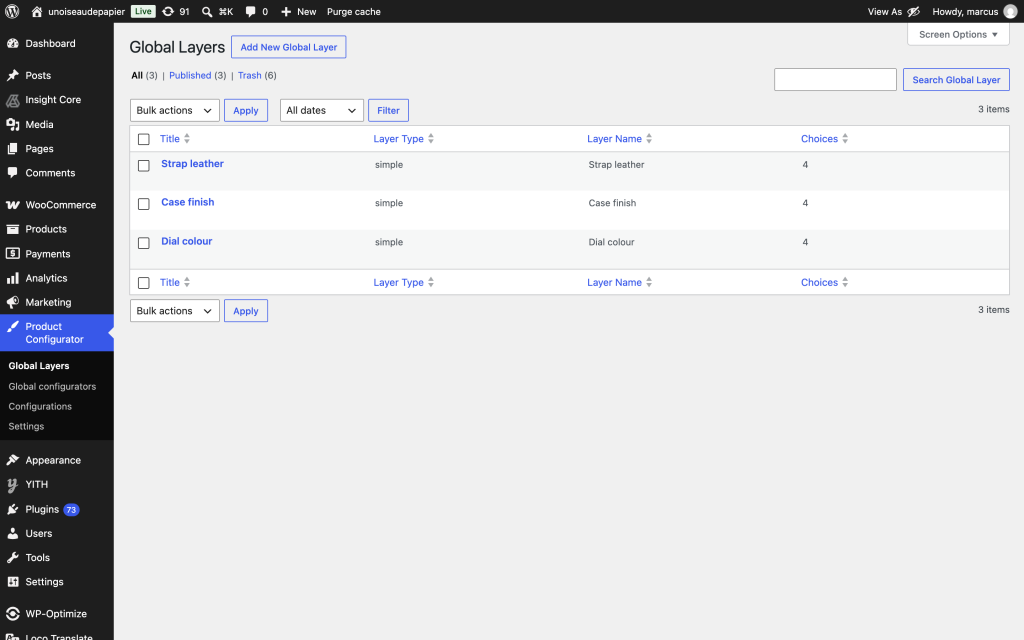
You can edit global layers from their own screen. However it is recommended to edit them from within a product's configurator, not from this screen — that way you always see the layer in the context of a real product, with its live preview.
Editing a global layer
Open any product that uses the layer, press Edit original, and make your changes there. There is no separate editing screen — you always work on the layer in the context of a real product, with its live preview.
Because the layer is shared, your change reaches every product using it. If only one product needs to differ, press Disconnect from global layer on that product instead, and edit the local layer you are left with.
Naming
Give global layers names that make sense across products, not names that only make sense on the product you happened to build them on. "Standard fabric range" travels well; "Chair fabrics" becomes confusing the moment you import it into a bag.
Deleting
Deleting a global layer affects every product that imported it. Before deleting one, check which products use it and remove the layer from them first.